Your submission was sent successfully! Close

Thank you for contacting us. A member of our team will be in touch shortly. Close

You have successfully unsubscribed! Close

Thank you for signing up for our newsletter!
In these regular emails you will find the latest updates about Ubuntu and upcoming events where you can meet our team.Close

Install Ubuntu desktop

1. Overview

What you’ll learn

In this tutorial, we will guide you through the steps required to install Ubuntu Desktop on your laptop or PC.

What you’ll need

  • A laptop or PC with at least 25GB of storage space.

  • A flash drive (12GB or above recommended).

Whilst Ubuntu works on a wide range of devices, it is recommended that you use a device listed on the Ubuntu certified hardware page. These devices have been tested and confirmed to work well with Ubuntu.

If you are installing Ubuntu on a PC or laptop you have used previously, it is always recommended to back up your data prior to installation.


2. Download an Ubuntu Image

You can download an Ubuntu image here. Make sure to save it to a memorable location on your PC! For this tutorial, we will use the latest Ubuntu 24.04 LTS release (available on April 25th 2024) which uses the new Ubuntu Desktop installer that will be included in all future Ubuntu releases.

If you are installing an older version of Ubuntu, such as Ubuntu 22.04 LTS, you will find that the visual presentation of the installer is different, but the overall flow should remain similar.


3. Create a Bootable USB stick

To install Ubuntu Desktop, you need to write your downloaded ISO to a USB stick to create the installation media. This is not the same as copying the ISO, and requires some bespoke software.

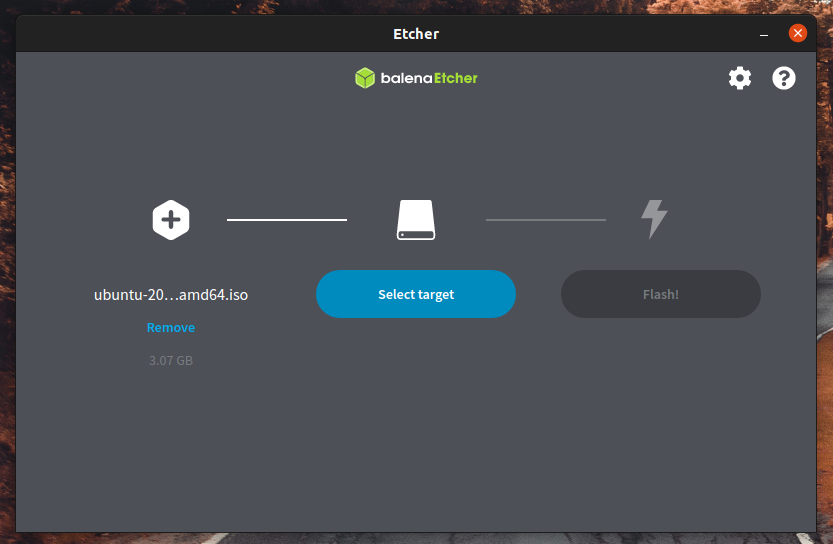
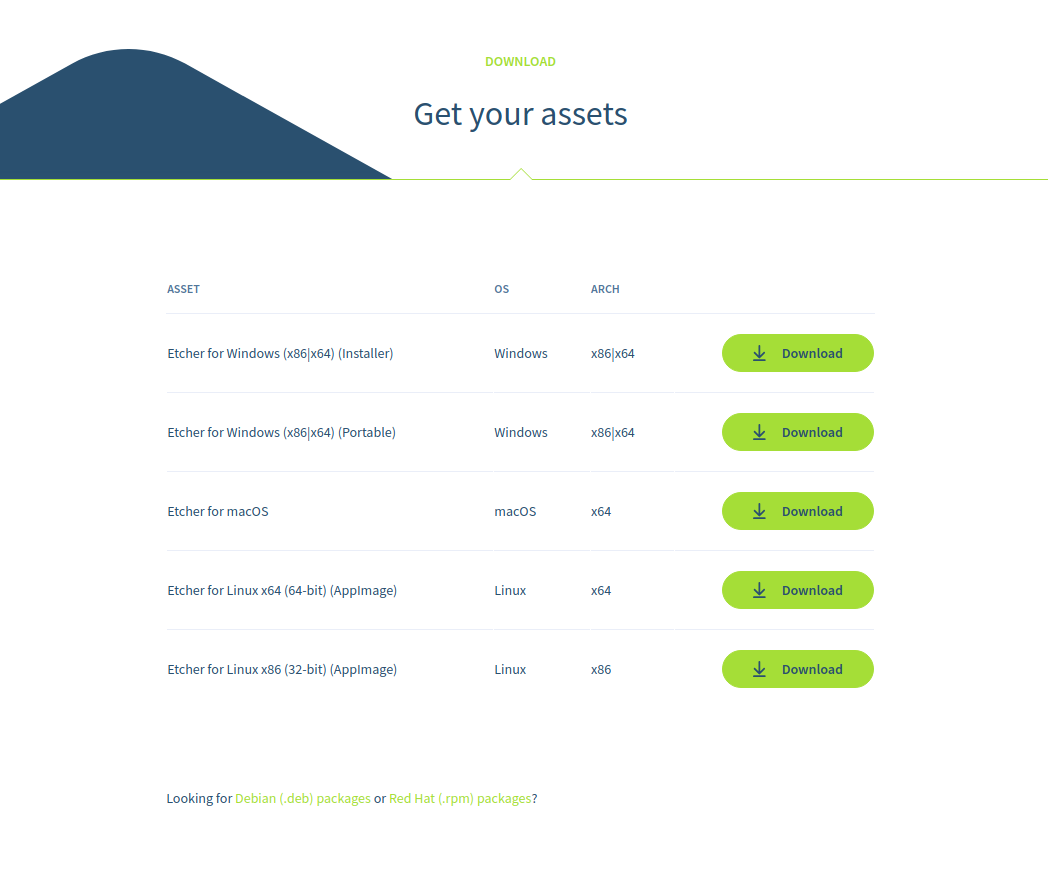
For this tutorial, we’ll use balenaEtcher, as it runs on Linux, Windows and Mac OS. Choose the version that corresponds to your current operating system, download and install the tool.

Select your downloaded ISO, choose your USB flash drive, and then click Flash! to install your image.


4. Boot from USB flash drive

Insert the USB flash drive into the laptop or PC you want to use to install Ubuntu and boot or restart the device. It should recognise the installation media automatically. If not, try holding F12 during startup and selecting the USB device from the system-specific boot menu.

F12 is the most common key for bringing up your system’s boot menu, but Escape, F2 and F10 are common alternatives. If you’re unsure, look for a brief message when your system starts – this will often inform you of which key to press to bring up the boot menu.

Once the installer has initialised you will be invited to choose your language

And then presented with the option to select any accessibility settings your require.

Your keyboard layout.

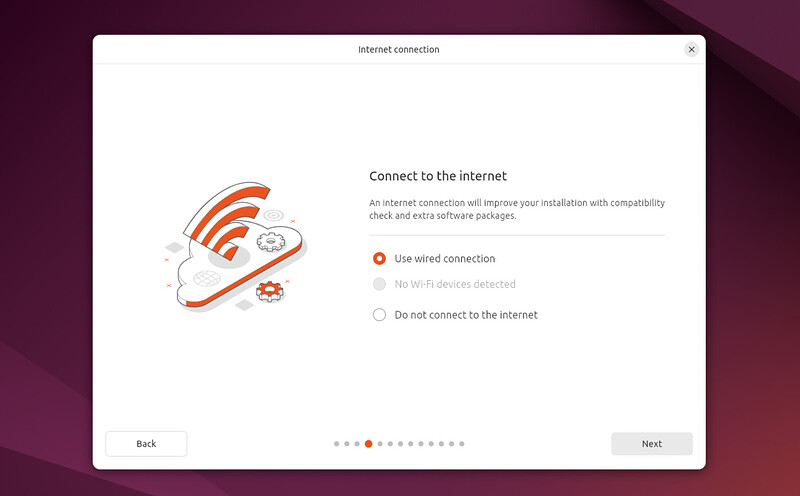
A connect to your network. This will allow Ubuntu to download updates and third party drivers (such as NVIDIA graphics drivers) during installation.

You are then offered the choice to try or install Ubuntu.

If you click Try Ubuntu, you can preview Ubuntu without making any changes to your PC. You can return to the installer menu at any time by clicking the Install Ubuntu shortcut on the desktop.

To proceed, click Install Ubuntu.

Some PC’s use Intel RST (Rapid Storage Technology) which is not supported by Ubuntu. If this is the case then you will not be able to proceed beyond this point without disabling RST in the bios menu of your machine. If you encounter this alert please visit help.ubuntu.com/rst for more information.


5. Installation Setup

You will be prompted to choose between Interactive installation and Automated Installation. The interactive option is the standard route, but more advanced users can use the automated installation option to import a configuration file from a web server to standardise multiple installs and add further customisations. An example tutorial for Automated installation is available here.

In this tutorial we will remain on the primary route.

You will be prompted to choose between the Default selection and Extended selection options. The default installation comes with the basic essentials to get started which you can then expand on after install using the App Center. The extended selection contains additional office tools and utilities, useful for offline situations.

In the following screen you will be prompted to install third-party software that may improve device support and performance (for example, Nvidia graphics drivers) and support for additional media formats. It is recommended to check both of these boxes.


6. Type of installation

This screen allows you to configure your installation. If you would like Ubuntu to be the only operating system on your hard drive, select Erase disk and install Ubuntu.

If your device currently has another operating system installed, you will receive additional options to install Ubuntu alongside that OS rather than replacing it.

Let’s take a moment to review all of the above options in detail.

Installing Ubuntu alongside another operating system

If you select this option you will be given a simple interface that allows you to select the drive you want to install Ubuntu on and a slider to determine the amount of disk space you would like Ubuntu to use. The available space is limited by the existing contents of the disk and is designed to avoid overwriting existing files.

This view automatically selects the largest partition on the drive. For more fine-grained control you can switch to the Manual partitioning option that is detailed further down.

Erase disk and install Ubuntu

If you select this option Ubuntu will take up the entire disk space on the selected drive.

If your PC has multiple hard drives then this option allows you to install Ubuntu alongside an existing OS as long as they each have their own drive. Take care to ensure that you are selecting the right drive in this instance!

This option also allows you to encrypt your entire drive using LVM, ZFS or using the Trusted Platform Module on the device. To do this open the Advanced features option before proceeding to the above screen and select ‘Encrypt the new Ubuntu installation for security’

LVM stands for Logical Volume Management. By using LVM during the setup, it makes it easier to create and manage partitions post installation.

ZFS allows users to create pooled storage volumes that span multiple drives as well as snapshorts and data repair features. It is a powerful option for advanced users.

TPM-backed full disk encryption is a new, highly experimental feature of Ubuntu Desktop that currently supports only the generic kernel. This means that machines that require additional drivers to support webcams or NVIDIA graphics cards will not support this setup until additional features land after release. In addition, certain hardware vendors may have BIOS options enabled that alter the chain of trust. Please do not select this option unless you are comfortable debugging or re-installing in the event of an issue.

If you select either LVM or ZFS based encryption you will be prompted to create a Security key that you will need to enter on boot before logging in with your user credentials.

If you are using TPM-based Full Disc Encryption you will be prompted to run the command snap recovery --show-keys after installing to generate a recovery key.

If you select encryption, it is important that you do not lose your security key! Write it down and store it in a safe place outside of your local system. You will not be able to recover your data without it!

Manual partitioning

Manual partitioning is designed for advanced users who want to create specific configurations for their use-cases. As such we assume that these users will be comfortable with this interface and will not go into detail during this tutorial on specific setups.

Here users can see all existing drives and partitions and create and manage new partition tables and configurations.

(Alert) Windows BitLocker is enabled

If your device has Windows BitLocker Drive Encryption enabled then Ubuntu will not be able to gather the drive information it needs to install Ubuntu safely alongside Windows.

If this is the case you will get a prompt to disable BitLocker in Windows before restarting the Ubuntu installer.

Disabling Windows BitLocker is not required when fully erasing Windows or when there is a separate, unencrypted drive available for Ubuntu. For more information see the final section at the end of this tutorial.


7. Create Your Login Details

On this screen, you will be prompted to enter your name and the name of your computer as it will appear on the network. Finally, you will create a username and a strong password.

You can choose to log in automatically or require a password. If you are using your device whilst travelling, it’s recommended to keep “Require my password to log in” enabled.


8. Choose your Location

Select your location and timezone from the map screen and click Continue. This information will be detected automatically if you are connected to the internet.


9. Ready to install

Clicking Next will take you to a summary of your installation configuration to give you a chance to confirm your setup before clicking Install.

If you had chosen to import an autoinstall configuration at the start of the installation process you would be taken immediately to this screen to confirm that your configuration has been installed correctly.

Once you proceed, Ubuntu will begin the installation process.


10. Complete the Installation

Sit back and enjoy the slideshow as Ubuntu installs in the background! :slight_smile:

Alternatively you can see a detailed output of the installation process by clicking the icon in the bottom right corner of the window.

Once the installation has completed, you will be prompted to restart your machine.

Click Restart Now.

When you restart, you will be prompted to remove your USB flash drive from the device. Once you’ve done this, press ENTER.

Enter your encryption password if you created one.

This is then followed by the login screen, where you can enter your username and password.

And that’s it, welcome to your new Ubuntu Desktop!

The welcome widget will help you with some additional setup options, including:

  • Attaching an Ubuntu Pro free personal or paid subscription to apply additional security patches to your device (this option is only available when using a long term support [LTS] version of Ubuntu).

  • Opting into sending device information to Canonical to help improve Ubuntu (by default, Canonical doesn’t collect device information).

  • Downloading additional apps from Ubuntu Software.


11. Don’t forget to Update!

It’s always good practice to ensure your system is up to date, especially after a fresh install.

The easiest way to do this is via the Software Updater app. Search for Software Updater via the app menu (the icon with 9 squares in the bottom corner of your window) and it will check for updates and apply them.

You can also update Ubuntu using the terminal.

Press CTRL+ALT+T to bring up a Terminal window (or click the terminal icon in the sidebar).

Type in:

sudo apt update

You will be prompted to enter your login password.

This will check for updates and tell you if there are any that need applying. To apply any updates, type:

sudo apt upgrade

Type Y, then press ENTER to confirm to finish the update process.


12. You’ve installed Ubuntu!

Thank you for completing this tutorial. We hope you enjoy your new desktop.

Check out our picks for Top 10 apps for a fresh Linux install in 2021.

If you have any issues, please contact us via the Ubuntu Discourse, or visit Ask Ubuntu.

You can also read the latest news about Ubuntu Desktop on the Ubuntu Blog.

As a next step, why not try:

For users who need to run both Ubuntu and Windows you can also install Ubuntu via Windows Subsystem for Linux (WSL).

To help us improve our tutorials, please let us know how you got on!

Survey:

I found this tutorial helpful

I found Ubuntu easy to install


13. (Additional) Installing Ubuntu alongside Windows with BitLocker

During the installation type step, you may find that you are unable to proceed with the installation without first deactivating Windows Bitlocker.

BitLocker Drive Encryption is a data protection feature that integrates with the Windows operating system. When activated, it will encrypt the contents of the hard drives in Windows, making the data inaccessible without the correct decryption key. It is designed to minimize the risk of data theft or exposure from lost or stolen computers.

When a user starts their computer and properly authenticates with the correct credentials, BitLocker will decrypt the data and allow seamless usage of the hard drive and the data it contains. Without the correct credentials, the encrypted hard drive data will look like random noise.

BitLocker & Ubuntu installation

If you plan to install Ubuntu side by side with Windows, you need to take into consideration the operational setup on your computer.

  • If you are not using BitLocker, Ubuntu will be able to see the correct hard drive structure, including any partitions and data stored on it. This allows the guided wizard to correctly map the data, and safely make adjustments to accommodate the additional installation of Ubuntu alongside Windows.

  • If you are using BitLocker, the hard drive contents will not be accessible, and they will appear as random noise. This means that the Ubuntu installer cannot correctly map data, and the additional installation cannot be safely performed without data loss… Additionally, some manufacturers ship systems with BitLocker enabled but the hard drive contents not yet encrypted. In this case the Ubuntu installer will also not be able to correctly map data.

You can:

  • Cancel the installation of Ubuntu and continue using Windows only.

  • Decide that the data stored in Windows is not important, and that you are willing to overwrite the data contents. The Ubuntu installer can then erase the entire contents of the hard drive and create its own structure (partitions and data). This is a destructive operation, with no option to recover any Windows data.

  • Decide to turn BitLocker off. This will turn off the encryption feature, and the hard drive and its data will be visible and accessible from the Ubuntu installer, allowing it to correctly and safely set up a side-by-side configuration. For systems with BitLocker enabled but not yet encrypted you will need to first turn BitLocker on and then turn it off.

  • Note: Not all versions of Windows will allow you to re-enable BitLocker after disabling it. If you wish to re-encrypt your Windows partition after installing Ubuntu alongside it, please check that your version of Windows supports this.

Turn BitLocker off

If you decide to proceed with the third option, you will need to do the following:

  • Back your data up - any encryption procedure, hard drive structure change or installation of new operating systems on a hard drive that already contains data can potentially lead to a data loss. You need to make sure your personal data is safe. Even simply copying the important files to an external drive can minimize the risk of data loss.

  • Quit the Ubuntu installer and reboot the computer into Windows.

  • In Windows, open Settings > type Manage BitLocker in the search box. Alternatively, open Control Panel > System and Security > BitLocker Drive Encryption.

Windows will now inform you that it is going to decrypt the data.

bitlocker-decryption-warning

This process can take a little bit of time:

bitlocker-decrypting

bitlocker-decryption-complete

  • Once this step is complete, reboot the computer, log into Windows, to make sure everything works correctly, and that all your data is intact.

  • Reboot your computer again, and launch the Ubuntu installer. At this point, you will be able to proceed with the hard disk configuration step.