The commands to provision Landscape’s server are executed on your Ubuntu workstation.
Landscape version 19.10, the current version as of this writing, requires Ubuntu 18.04 LTS (Bionic Beaver).
If your CPU has 2 cores, or if you are performing nested virtualisation, launch a Multipass Bionic instance with only 1 vCPU:
multipass launch focal --name=landscape --cpus=1 --mem=4G --disk=20G -vvv
If your CPU has 4 cores or more, you can launch a Multipass Bionic instance with 2 vCPUs:
multipass launch focal --name=landscape --cpus=2 --mem=4G --disk=20G -vvv
Open a shell prompt on the Multipass Ubuntu virtual machine where Landscape will be installed by running this command in the Terminal:
multipass shell landscape
Add the Landscape PPA repository:
sudo add-apt-repository --update ppa:landscape/self-hosted-23.03 -y
You will see the following prompt:
Repository: 'deb https://ppa.launchpadcontent.net/landscape/self-hosted-23.03/ubuntu/ focal main'
Description:
Dependencies for Landscape Self-Hosted release version 23.03.
More info: https://launchpad.net/~landscape/+archive/ubuntu/self-hosted-23.03
Press [ENTER] to continue or Ctrl-c to cancel adding it.
Press Enter to proceed, and install Landscape using the quickstart method:
sudo apt install landscape-server-quickstart -y
Postfix configuration extends beyond the scope of this tutorial. Selecting No Configuration is suitable at this time, because Postfix can be easily configured at a later time.
The installation process with 1 vCPU can take some time. Observing CPU and disk metrics in the System Monitor will help pass the time, because the progress bar will take several minutes to get past the 99% mark. A successful installation can be confirmed after the progress bar reaches 100%, and the following triggers are all processed:
Processing triggers for libc-bin (2.31-0ubuntu9.9) ...
Processing triggers for rsyslog (8.2001.0-1ubuntu1.3) ...
Processing triggers for ufw (0.36-6ubuntu1) ...
Processing triggers for systemd (245.4-4ubuntu3.22) ...
Processing triggers for man-db (2.9.1-1) ...
Processing triggers for dbus (1.12.16-2ubuntu2.3) ...
Issue the shutdown command to turn off the Landscape instance. You will return back to your workstation’s shell, where we will use libvirt’s command line tools to add the Landscape instance to the management network.
sudo shutdown -h now
The subsequent steps require the Landscape virtual machine to be fully shut down. We do not want Landscape to obtain an IP address dynamically from the management network, because we want to associate a fixed IP address to the MAC address of Landscape’s network interface connected to the management network. Shutting down the Landscape virtual machine helps us avoid the hassle of revoking a dynamic IP address assignment.
You can observe the Landscape virtual machine’s state in the Virtual Machine Manager application. It should say “Shutoff” under the virtual machine’s name when viewing the list of virtual machines, and it will say “Guest is not running” if you look at the console window within Virtual Machine Manager.
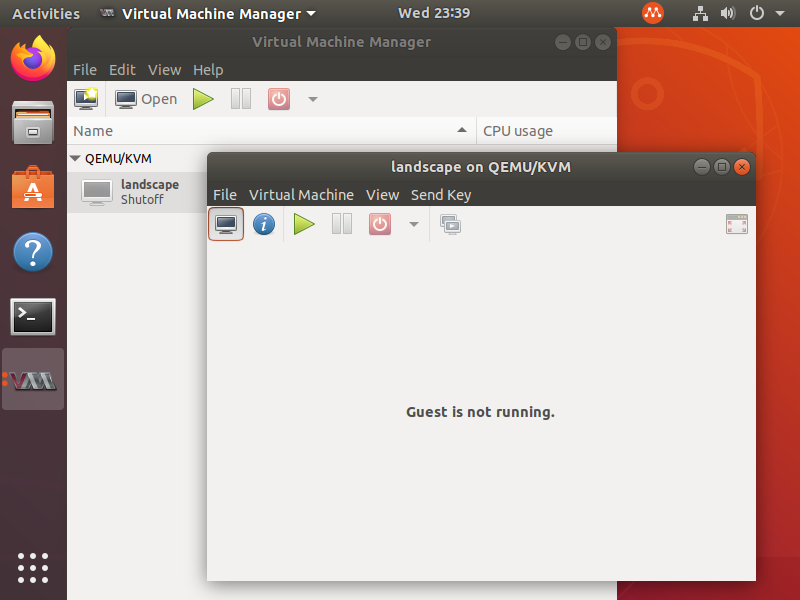
The following steps for observing the VM shutdown on Ubuntu Server are also compatible with Ubuntu Desktop.
It is possible to see the output of the console as the virtual machine performs its shutdown routine, by running this command in a separate Terminal window, or a separate SSH session:
virsh console landscape
The powered off state can be confirmed when the console prints out a “Starting Power-Off” and “Power down” message:
         Starting Power-Off...
[  158.395261] reboot: Power down
If the machine has completely shut down, the virsh console command will produce the following error message:
error: The domain is not running
You can also observe the Landscape virtual machine’s state when listing all virtual machines:
virsh list --all
It will produce an output similar to the following:
 Id   Name        State
---------------------------
 -    landscape   shut off
Configuring the Landscape network interfaces is a two-part journey:
- The virtual network configuration is performed in the Terminal of your Ubuntu workstation, which is now acting as the host machine for your virtual machines.
- The network adapter configuration is performed in a shell prompt on your Landscape virtual machine.
Virtual Network Configuration
Out of the box, only one virtual ethernet adapter is attached on all Multipass instances. This network interface is connected to the default network, with DHCP enabled. This default network should not be removed or modified, as Multipass relies on this interface for administrative purposes. Instead of configuring virtual machines with an additional virtual ethernet adapter, and binding this adapter with a static IP address, the network configuration will be managed at the host layer. IP reservations for Multipass and libvirt virtual machines are achieved by mapping the MAC addresses of virtual ethernet adapters in virtual machines to specific IP addresses on the management network. The benefit of this approach is that all the network configurations are defined in a single place on the host machine, and not within each virtual machine. Furthermore, there is a clean command line interface to manipulate libvirt network configurations.
First, let us list the unique hardware MAC address of the default virtual ethernet adapter on the Landscape instance, assigned by Multipass:
virsh dumpxml landscape | grep -i '<mac' | grep -oP "(?<=').*?(?=')"
Next, we add a second adapter, and connect it to the management network:
virsh attach-interface --domain landscape --source management --type network --model virtio --config
The following notification is printed when an interface has been successfully attached:
Interface attached successfully
Repeat the command to list MAC addresses for the network interfaces and confirm that two network interfaces exist on the Landscape instance:
virsh dumpxml landscape | grep -i '<mac' | grep -oP "(?<=').*?(?=')"
If you only see one MAC address
It is likely that the virsh attach-interface command was executed while the Landscape virtual machine was still running. If you’re cruising through these steps, you may have run the virsh attach-interface instruction while the shutdown process was still being performed.
You can verify whether the Landscape virtual machine has finished shutting down, and whether the adapter is present, through the graphical user interface of the Virtual Machine Manager application. There should be 2 NICs in the left column, and the second NIC’s network source will be “Virtual network ‘management’: NAT”. The MAC address of this second NIC will be visible in this application as well.
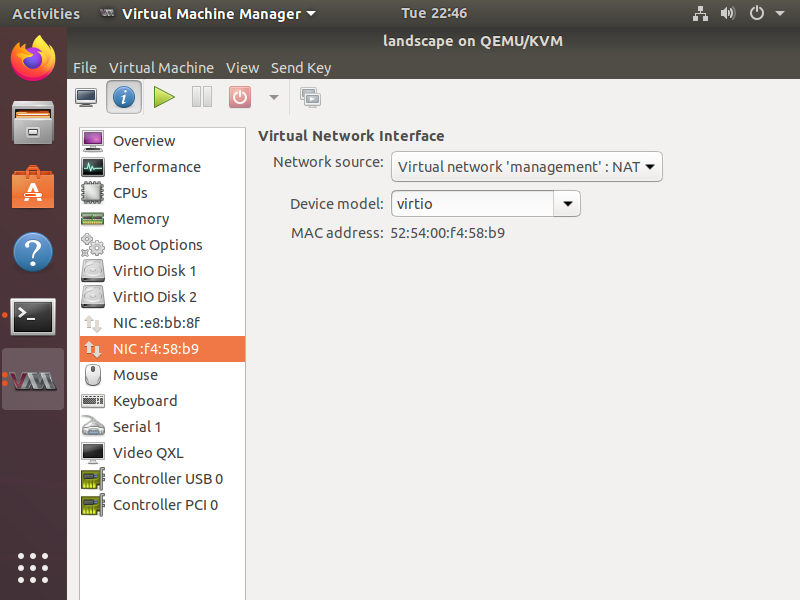
The second MAC address in the list belongs to the new interface. Your MAC address will be unique to your workstation, and will not match the screenshot in this guide.
This command prints out the MAC address for the second network interface on your Landscape virtual machine explicitly. If a second network interface does not exist, it will not print anything. (If a third network interface exists, it will be ignored, and only the second network interface’s MAC address will be displayed, because of the sed command at the end.)
virsh dumpxml landscape | grep -i '<mac' | grep -oP "(?<=').*?(?=')" | sed -n 2p
Instruct the DHCP server operating the management network to look for the MAC address of this newly added second adapter, and always assign it 192.168.33.2. This command will bind the second NIC’s MAC address to the management network:
virsh net-update management add ip-dhcp-host '<host mac="'$(virsh dumpxml landscape | grep -i '<mac' | grep -oP "(?<=').*?(?=')" | sed -n 2p)'" ip="192.168.33.2"/>' --live --config
The following notification is printed when the DHCP server responsible for the management network has accepted this new configuration:
Updated network management persistent config and live state
Confirm the new network interface on the Landscape server has been associated with a static IP address on the management network. This command filters the XML output of IP address assignments on the management network:
virsh net-dumpxml management | egrep 'range|host\ mac'
The output should look like this, with the exception of the MAC address being unique to your system:
<range start='192.168.33.2' end='192.168.33.254'/>
<host mac='52:54:00:99:90:6b' ip='192.168.33.2'/>
Now that the virtual network interface has been connected to the management network, the Landscape instance must be made aware of this addition. Boot up the Landscape instance. You can either use:
- the Virtual Machine Manager application, but you still need to run multipass shell to connect once it boots up
- or you can rely on the multipass shell command to boot up the machine and subsequently connect to it.
Option 1: boot up via the Virtual Manager Application
The primary benefit of using the Virtual Manager Application is getting a windowed view of the console output.
To start the Landscape virtual machine from within Virtual Machine Manager, click the button with the triangle/play icon:
You can observe the console output to determine when it is completely started up. When the machine is ready, you will see the login prompt:
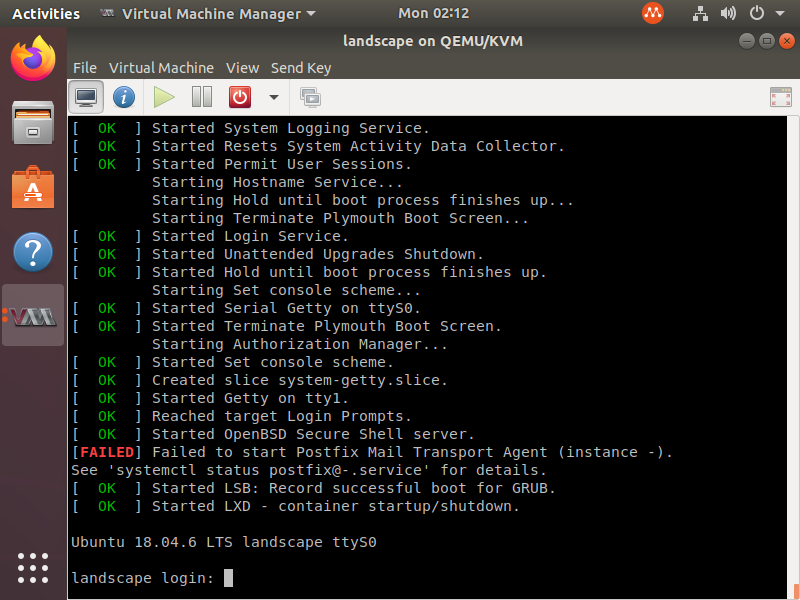
Do not try to log in from within Virtual Machine Manager here. Instead, open the Terminal application on your workstation, and use the multipass shell command to open a shell prompt to the virtual machine:
multipass shell landscape
Option 2: boot up via Multipass Shell
Open the Terminal application on your workstation, and use the multipass shell command to open a shell prompt to the virtual machine:
multipass shell landscape
If you wish to observe the console output as the instance boots up, you can run this command in a separate Terminal window:
virsh console landscape
You can exit from the virsh console anytime by pressing CTRL + ]
Network Adapter Configuration
Once the Landscape instance is fully booted up, and you have connected to its shell prompt, list the network adapters:
ip a
This snippet from the ip a output shows that a new network adapter named “ens7” has been added, but not configured:
3: ens7: <BROADCAST,MULTICAST> mtu 1500 qdisc noop state DOWN group default qlen 1000
    link/ether 52:54:00:bb:18:2c brd ff:ff:ff:ff:ff:ff
We need to configure the network on ens7 in a way that persists across reboots. This network configuration needs to be performed in a manner that is cloud-init friendly.
Yq is a useful command line utility for updating YAML based configuration files through a terminal or shell script. Install yq as a snap with this command:
sudo snap install yq
Yq manipulates the /etc/netplan/50-cloud-init.yaml file, adds the appropriate configurations for defining ens7, and writes the output to /etc/cloud/cloud.cfg.d/50-curtin-networking.cfg.
sudo cat /etc/netplan/50-cloud-init.yaml | yq e '.network.ethernets.ens7.dhcp4 = true | .network.ethernets.ens7.match.macaddress = "'$(cat /sys/class/net/ens7/address)'" | .network.ethernets.ens7.set-name = "ens7"' - | sudo tee /etc/cloud/cloud.cfg.d/50-curtin-networking.cfg
This is a screenshot of my /etc/cloud/cloud.cfg.d/50-curtin-networking.cfg file.
Indentation provides semantic meaning in YAML files, and is important.
If you are manually editing the configuration file, remember to use spaces and not tabs.
Upon saving this file, cloud-init should now be instructed to re-run all stages as it did on first boot. This command will abruptly disconnect the shell session on the Landscape instance:
sudo cloud-init clean -r
Cloud-init will consume the changes in /etc/cloud/cloud.cfg.d/50-curtin-networking.cfg and propagate them to /etc/netplan/50-cloud-init.yaml on startup. This process will take some time. Watching the progress in the Virtual Machine Manager console will show you when the Landscape instance is done restarting, and ready.
You will see one error related to Postfix towards the tail end of the startup process
We did not configure Postfix during the course of this tutorial. This warning can be safely ignored for now.
You can watch cloud-init perform its tasks through the console, by running this command in a separate Terminal window, or a separate SSH session:
virsh console landscape
Alternatively, you can monitor the console through Virtual Machine Manager, if you installed that application earlier. This is a short video of the cloud-init step.
Once you see the “landscape login:” prompt, you can proceed to the next step. If the screen seems frozen, press Enter, and if the system is idle and ready, the login prompt will appear.
Landscape should be accessible via hostname from the host machine, and from other virtual machines. For simplicity, I have set the hostname to “landscape”.
Map the Landscape hostname
Allow your workstation to find the Landscape instance by its “landscape” hostname. Mapping the “landscape” hostname to 192.168.33.2 within /etc/hosts is achieved by running this command on your Ubuntu workstation:
grep -qxF '192.168.33.2 landscape' /etc/hosts || sudo sed -i "3i192.168.33.2 landscape" /etc/hosts
The grep command’s parameters keep it quiet (-q), match the whole line (-x), and pattern match (-F). If the /etc/hosts file does not contain this entry for Landscape, it is inserted as a new third line within the file.
Set up Landscape’s Global Administrator
Configure Landscape via the web interface. Using Firefox, visit https://landscape.
Disregard the “Warning: Potential Security Risk Ahead”. Click Advanced to expose a second prompt, and click Accept the Risk and Continue.
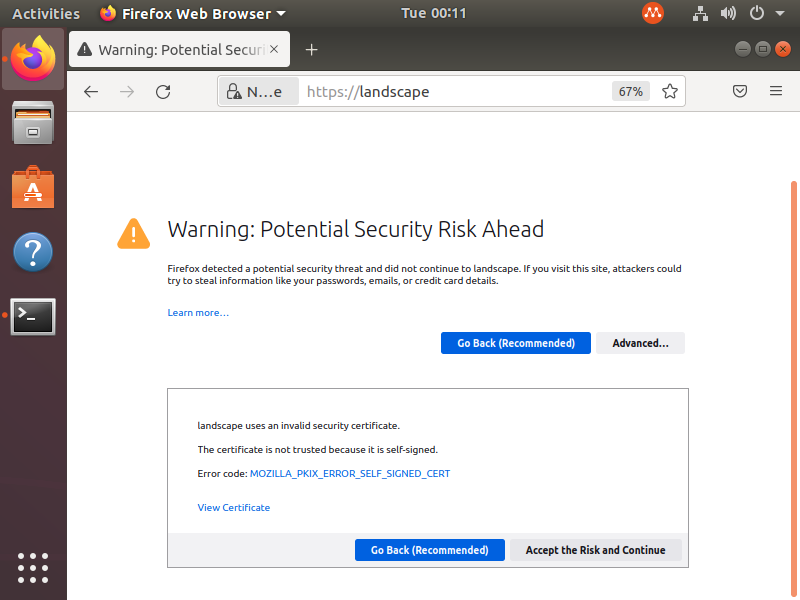
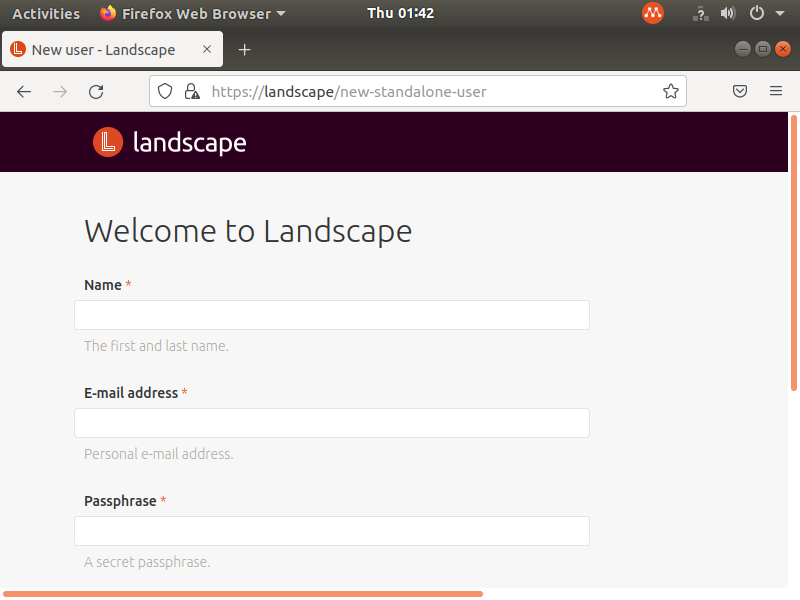
When you arrive at the “Welcome to Landscape” screen, provide your name, email address, passphrase (password), and click Sign up.
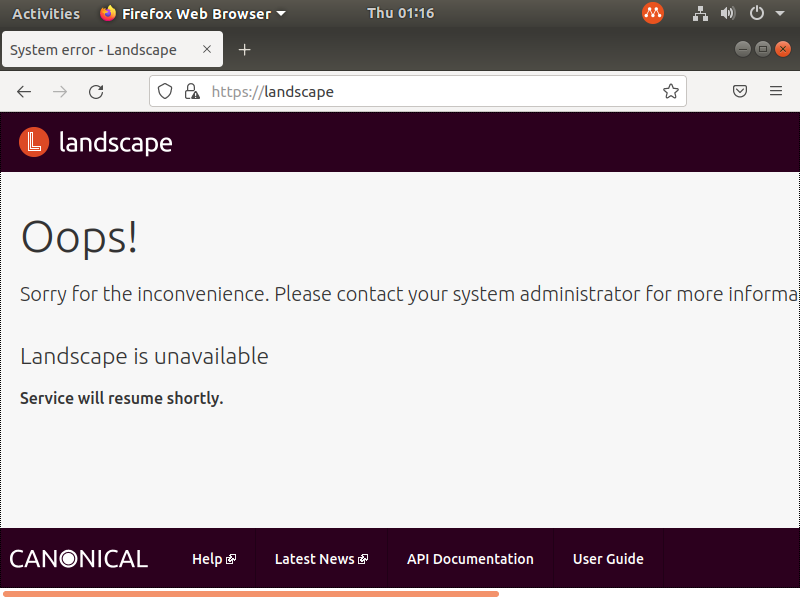
In low memory systems, you may encounter an “Oops” screen, instead of a “Welcome to Landscape” screen. If this happens to you, your Landscape virtual machine needs to be restarted.
To restart, connect to the Landscape shell:
multipass shell landscape
Issue the reboot command within the Landscape virtual machine:
sudo shutdown -r now
Once the Landscape virtual machine is fully rebooted, attempt to connect to the web interface once more.
Copy Landscape’s self signed certificate
There are helpful file system integrations between your Ubuntu workstation (the host) and the Multipass virtual machines. Use these integrations to place the /etc/ssl/certs/landscape_server_ca.crt file from Landscape Server somewhere accessible on your Ubuntu workstation. From this location on the host, we will be able to copy the landscape_server_ca.crt file to the appropriate locations on each Multipass virtual machine you start up.
From within the Terminal application on your workstation, we will use Multipass to copy the /etc/ssl/certs/landscape_server_ca.crt file to your home directory on the host:
multipass mount $HOME landscape
multipass transfer -vvvv landscape:/etc/ssl/certs/landscape_server_ca.crt $HOME
multipass umount landscape


